It’s a free pattern with no seam finishing – which is my least favourite sewing task.
The easiest pattern I’ve ever sewn: the Lazy Days Skirt by Oliver + S.
I don’t have many construction photos of this skirt because I made this years ago. This is actually the third kid to wear this skirt. Yay, for hand-me-downs!
The air is crisp and the leaves are falling. So it’s the perfect time for a fall blog hop.
Ready for the world.The whole look.
The Warp & Weft Sewing Society have all pitched in to showcase the latest fabric collection by Canadian surface designer Elizabeth Owen. The collection is called Wildwood, and it’s a really quite pretty. The inspiration for the collection was the wild woods of story books, so I was excited to see what would be in my Warp & Weft delivery.
I decided to start with the story of Hansel and Gretel for inspiration, and so I made an outfit for my own “Gretel”, Kid No 1.
I really like this colour combo.
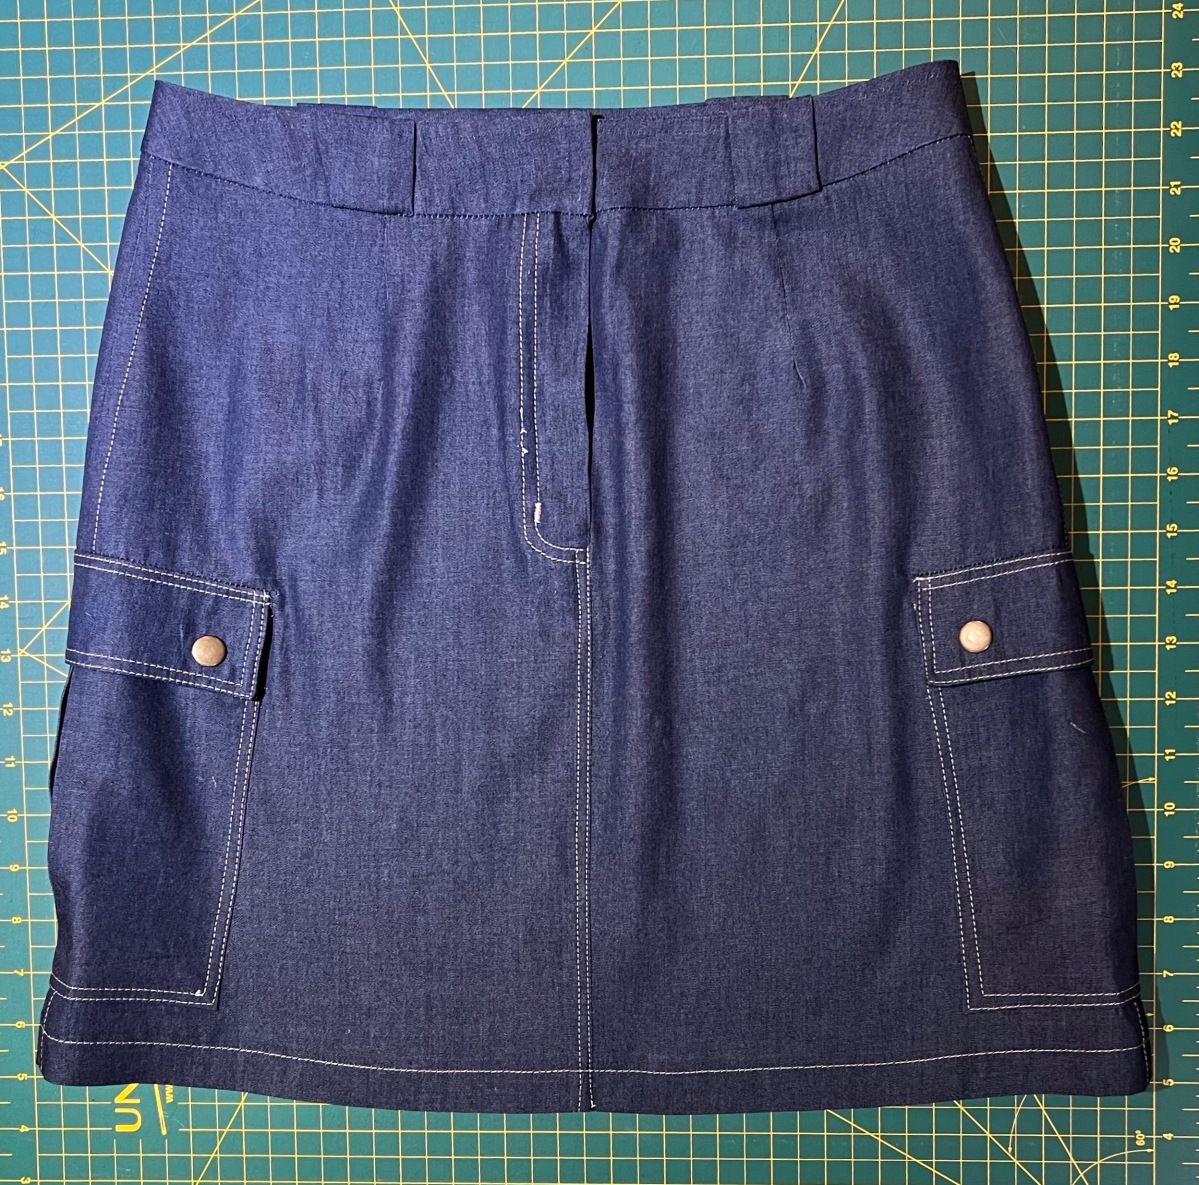
I made a simple panel skirt in Essex linen. The pattern is from Collection privée filles & garçons by Atsuko Maruyama and Noriko Onoda (a French translation of the Japanese pattern book シンプル&デサイン おんなの子服 おとこの子服 ). The book contains 27 patterns available in sizes 90-140 cm. I made the “#12 Jupe à panneaux” (panel skirt) in size 120. Then I used the Wildwood print to make a matching blouse, McCall’s 6388, using some blue solid for contrast.
I really like the buttons on the blouse.The skirt is a simple panel skirt, and linen has just the right weight.
And of course Gretel needs a bag to carry her breadcrumbs, so I added a small satchel, the “#7 Sac tube” (tube bag), also from Collection privée filles & garçons. The bag is made in linen and lined with the Wildwood print.
I love the simplicity of the bag.Hey, what’s in here?Look what I found!
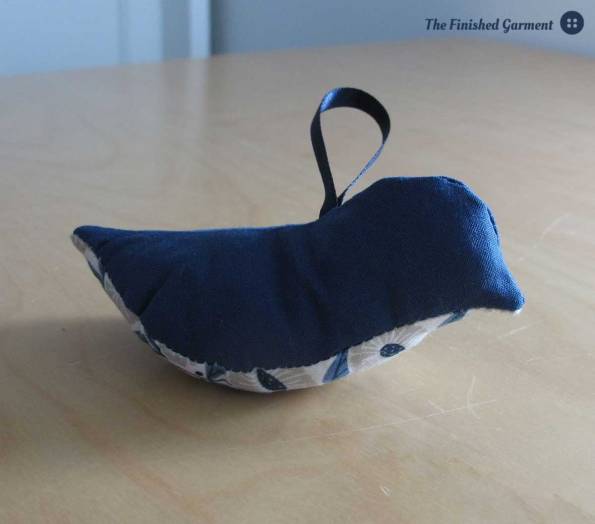
That meant that only one thing was missing – birds! I couldn’t count on the local wildlife to pop in for my photo shoot, so I made three little birds using the pattern from Last-Minute Patchwork + Quilted Gifts, and the leftover scraps from the other pieces.
I like the blue bird best.These are quite small, and the pattern is quick, but a little finicky.
Thanks for stopping by, and be sure to visit the other amazing sewists on our blog hop!
Blouse: McCall’s 6388 available in sizes 2-8, but now out-of-print. I made the size 6.
Skirt and bag: From Collection privée filles & garçons by Atsuko Maruyama and Noriko Onoda (a French translation of the Japanese pattern book シンプル&デサイン おんなの子服 おとこの子服 ). The book contains 27 patterns available in sizes 90-140 cm. I made the “#12 Jupe à panneaux” (panel skirt) in size 120, and the “#7 Sac tube” (tube bag).
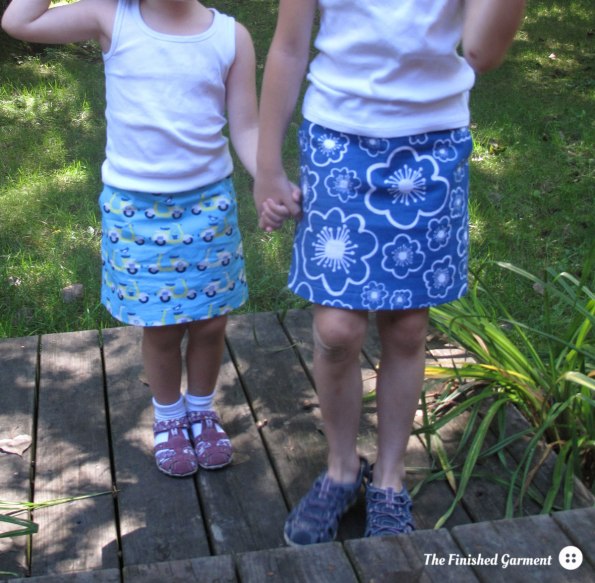
We’re just experiencing the last bit of summer here, so I’m taking the opportunity to show you one of my very last summer projects – two fun summer skirts.
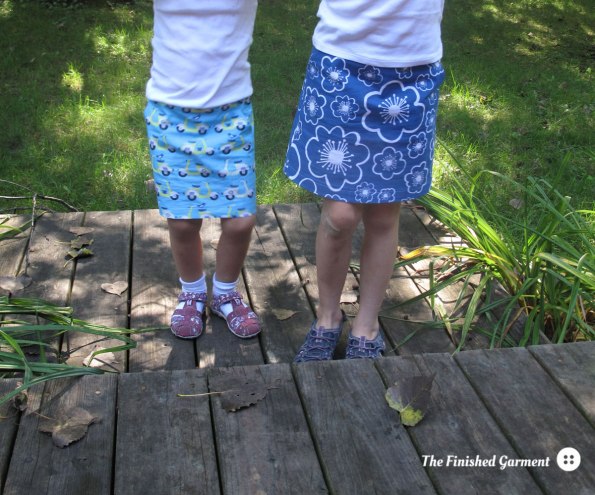
It’s a very quick, easy pattern, and makes a nice, basic skirt. I made this in sizes 4 and 6. The only changes I made were to lengthen the size 4 by one inch, and the size 6 by two inches, and lower the kick pleat to match. I also added the pockets from the Oliver + S Sandbox Pants, to the back of the larger skirt.
I lengthened both skirtsAfter I lengthened it, the skirt is just right for looking for chipmunks.
I used stash fabric for both skirts, leftover from otherprojects. This pattern takes a little under 3/4 of a yard of fabric, per skirt, which is what I had.
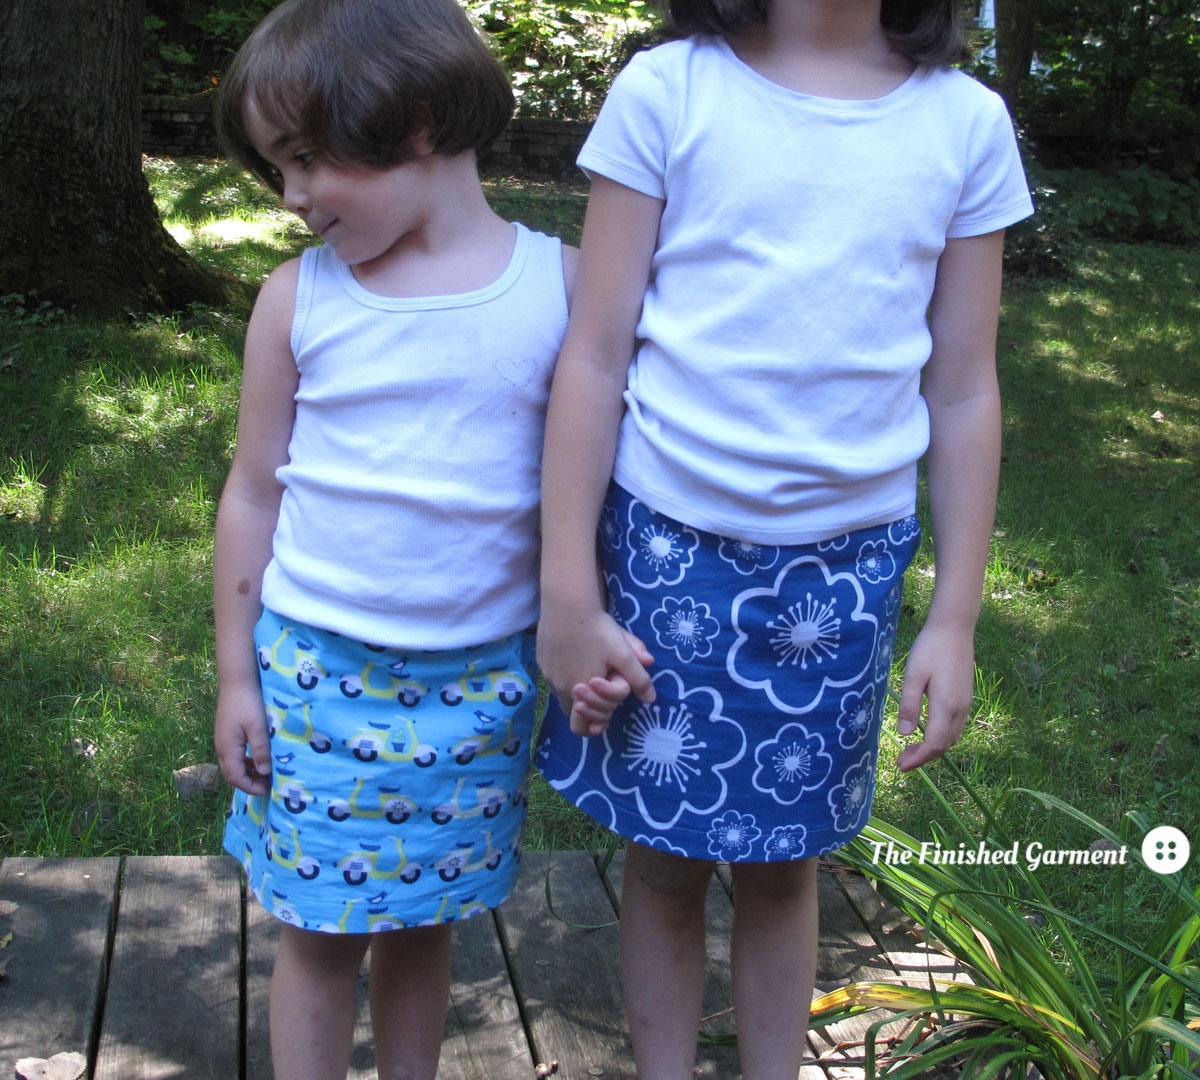
The print is really fun for summer. I’m glad I could get two garments out of the fabric I had.
It’s a great pattern if you have just a little bit of fabric left over. But unfortunately, it meant that pattern matching was out of the question. Since this fabric would have been wasted otherwise, and these skirts were meant for casual fun, that seemed fine, this time around. I settled for an absence of awkward print placement, but I had to trace out the pieces with chalk a couple times in the size 6, to get that right.
This print is Bella Flower in Blue by Lotta Jansdotter. And I swear I ironed it right before this photo was taken.This print is Scoot Scoot in Blue from the Havana collection.Each skirt took less than 1 yard of fabric.
The skirts are a big hit and seem to get worn at least once a week, which is a lot with my sometimes finicky kids.
Scoot Scoot in Blue from the Havana collection by Monaluna (organic).
Sizes: 4 and 6. Cost: Pattern: 0$. Fabric: 0$ (all was leftover pieces from other projects). Sewing Level: Beginner. Modifications: I lengthened the skirt, by 1-2″, depending on the size, and lowered the kick pleat. Results: Great. These were fast, are super comfortable, and are now in heavy rotation.
Kid No 1 needed a pirate costume for her school play, and I figured, if I was going to make something, I should make something she could wear all summer. I decided a stripy maxi skirt would be just the thing.
I didn’t use a pattern for this one. I just followed the Girls’ Knit Maxi Skirt Tutorial by Crafting Chicks. It was very simple and straight-forward, and the whole thing took under an hour. The tutorial makes a long, slightly a-line skirt with a yoga waistband.
Mini Maxi Skirt
I sewed this on my regular machine, which has an overlock-style stitch. I didn’t bother to hem it.
Also, no model for this one. Kid No 1 wasn’t in a great mood. Oh well!
I used a bamboo jersey from Telio. It’s really springy and soft, and though this skirt takes under one yard of fabric, I may have, ahem, purchased four meters. So expect to see more stripes on the blog soon.
Gastroenteritis folks. It’s done two rounds at our house. The laundry has been Sisyphean. The sewing, minimal. The sleep? Well, let’s not even mention the lack of sleep.
I have managed to eek out a super quick project though.
The Sunday brunch skirt by Oliver + S, sewn by The Finished Garment
Ages ago I bought a few yards of chocolate brown baby cord. After four pair of kid-sized pants and my Ginger skirt, I was left with just under a yard. Cue kid No 1 complaining about having no winter skirts “at all”. Hmmm, possibly a slight exaggeration. But in any case, we couldn’t have that, so I whipped up this skirt the same evening.
Back of the Sunday brunch skirt.
This is the Oliver + SSunday Brunch Skirt. It’s a simple, straight skirt (though the pattern is described as a-line), with elastic waistband, pockets and a black kick pleat. I made this in a size 6 and it fits just right.
The skirt has a cute kick pleat.
As always with Oliver + S patterns, this was a dream to sew. The instructions were so very clear, and I finished the whole thing in under 3 hours. That includes tracing the pattern and cutting the fabric. If I hadn’t added piping, it would have been even faster.
The only changes I made were to add an inch to the length and add flat piping in a pretty lavender print. The skirt definitely needed that extra inch. And the piping will match a top that’s in the works.
I added flat piping.
Kid No 1 was in the skirt the next morning and out the door to school, so I would have to say that this was a highly successful project. Unfortunately, that left very little time for photos, and it was dark and dreary so these are not my best. Another skirt for Kid No 3 is on the way, if only I can get the laundry done.
The skirt is a big hit. Yay!Side view of the Sunday brunch skirt by Oliver + S,
Fabric: Baby cord. I used quilting cotton for the flat piping. The print is FloraDots in Violet from the La Dee Da collection by Erin McMorries for Free Spirit Fabrics.
Size: 6.
Sewing Level: Beginner.
Modifications: Added an inch to the length and used flat piping for trim.
Results: Great and fast. I would recommend this pattern and plan to make it again. In fact, I’ve already cut out the fabric!
I have been slowly rebuilding my wardrobe with some basic everyday clothing. After four pregnancies, all pretty close together, my wardrobe is in rough shape. I’ve also changed shape, and so my old clothes just don’t fit right. Rather than battle the clothes racks with four kids in tow, I’ve decided to make what I can.
This is my latest project, the Ginger skirt by Colette. It’s a simple, high-waisted a-line shirt, fitted in the hips with an invisible zipper.
Me in my Ginger skirt.
I used a super soft baby cord, which is the same fabric I used to make pants for my kids. They think this is hilarious. Ha! Just wait till high school, kids.
I cut the size 18, based on my waist measurements, but I ended up taking in two inches, and I could have taken it a bit more in the hips. Next time, I’ll cut a 14, graded out to a 16 waist.
At first I thought the 18 looked ok. But it wasn’t lying smooth over the front of my hips. So I scoured the internet looking for similar body shapes, in the same skirt, and with the same problem, and they all had their skirts quite low on the waist. So I raised the waist and took in the sides and the skirt fit so much better. It was a whole new garment. I’m honestly not used to such a high-waisted skirt. Most ready-to-wear a-line skirts are designed to sit lower, but I do like the look. Next time, I’ll also take the skirt in a little more in the hips.
I took this photo before I raised the waist and took in the waistband. You can see how it’s not smooth in the front.This photo was taken afterwards, and it fits so much better.
Adjusting the fit was quite easy. So if you are a bit larger than the largest size (or smallest than the smallest size), you shouldn’t have too much trouble grading up (or down) a size or two and still getting good results.
Ginger A-line Skirt Pattern by Colette Patterns.
I made version 3, which has a straight waistband , and is cut on the bias. With baby cord, the results are not quite as dramatic as the chevron stripe pattern shown on the pattern packaging, but it does make for a really nice hanging skirt. Even my husband mentioned that it hung really nicely, and with no prompting (!!!). Using baby cord also means you don’t need to worry about matching the stripes.
You can just see how the bias cut skirt makes a chevron pattern, but it’s very subtle in baby cord.
The skirt has an invisible zipper, which went in really easily.
What do you think? Is that zipper invisible enough for you?
I added some very thin tricot interfacing to the skirt before adding the zipper, to stabilize it. But because the skirt was cut on the bias, it was still a little stretchy, so I also used bias tape on the seam edges, a suggestion from a couture sewing book, and this worked very well.
Here you can see the inside of the invisible zipper where I’ve used bias table to help stabilize.
Hemming was a bit of an adventure. I let the skirt hang for a few days before I started. I had read how Sunni of A Fashionable Stitch has Mr Stitch help her with her hemming. So I gave it a shot. I can now confirm, that while Mr Garment has many superpowers, garment hemming is not one of them. He’s pretty good with compliments though (see above). Needless to say, I had to re-hem. Luckily, my hems usually fall pretty straight, so I guess I’ll just continue t0 hem on my own. I think next time, I’ll go a couple inches shorter as well. What do you think?
I didn’t line the skirt and simply zigzagged the seams. It’s a corduroy skirt, after all.
I used quilting cotton to line the waistband, since it’s pretty and more comfortable and cuts down bulk.
At first I was a bit shocked by the price of the pattern. I paid $18, which, for a simple a-line skirt pattern, is a lot. (You can get the PDF version for $12, which is better). But I wanted to try a Collette pattern (this is my first), and it was a gift as well (though I picked it out myself). I’ve found that the fit is really quite nice, and I will use the pattern again, so overall, still a worthwhile purchase.
I tried to get another photo session organized, but what are those white marks on my skirt?Oh you think that’s funny? (Those white marks are tiny hand prints made of baby powder). Thanks kid!
I really like this pattern. It has a really nice fit, and is quick to sew, but also has a lot of room for creativity, if you are feeling up to a challenge. I’ll almost certainly make it again.
So you want to make Megan Nielsen’s Kelly skirt, but it doesn’t come in your size? Whether you need a plus size like XXL, or 3X, or a smaller size, like XXS there is an easy solution – grading the pattern.
What is Pattern Grading?
Grading a pattern just means to take a pattern up or down a size, or more. There are many ways to grade a pattern, and lots of articles on how to do this. It can be a complex process, depending on the pattern. But it doesn’t have to be. In fact, if you have never graded a pattern, the Kelly Skirt is the perfect one to start with.
This skirt fits waists between 26 and 34 inches (66-86 cm). In commercial pattern sizes, that translates roughly to sizes 12 to 20. That is a pretty good range, but we can easily extend that range.
This week I published my own version of the Kelly Skirt and I mentioned that it is an easy pattern to grade. I recently had my fourth baby, and although I would normally be a size large in the Megan Nielsen size range, my waist is (temporarily I hope!) larger than the largest size included in the pattern. I graded the pattern up a size. I am not an expert pattern grader, this is just the way I graded the pattern. Since it worked out well, I thought I’d share.
Getting Started
In order to grade the pattern, you will need to trace the pattern onto tracing paper, with a few simple modifications. If you have never traced a pattern before, I suggest you read “How to Trace Sewing Patterns” by Sunni on a Fashionable Stitch. There are also some good photos of the process here.
You will need tracing paper, a pencil and a ruler.
A Little Math
You will start by comparing your measurements to the closest pattern size. You can ignore the bust measurement completely. Because the skirt is gathered and has a fair bit of room in the hips, in most cases, you can just look at the waist measurement. However, if you have very large hips, compared to your waist, you may need to make more complex modifications. For this tutorial, we’ll assume your hips and waist are roughly proportional.
What measurements to look at when grading the Kelly skirt.
Going Up a Size
If you are going up a size, compare your waist to body measurements for the largest pattern size. The waist measurement given for the XL size is 34 inches. My waist is 37 inches at the moment. That means I need to add 3 inches to the XL size.
Make sure you are looking at the body measurements and not the finished garment measurements. The finished garment measurement won’t be skin-tight, it should have some ease or breathing room, so that the clothing will be comfortable to wear. This pattern has around 3/4 of an inch of ease at the waist. Professional pattern graders adjust the ease in very precise ways, but we’ll just use the ease of the closest size (XL or XS).
Going Down a Size
If you are going down a size, compare your waist to the to body measurements for the smallest pattern size. The waist measurement given for the XS size is 26 inches. If you have a 24 inch waist, you would need to subtract 2 inches from the XS size. Again, make sure you are looking at the body measurements and not the finished garment measurements.
Modifying the Pattern Pieces
There are only 5 pattern pieces in the Kelly Skirt.
There are only five pattern pieces for the Kelly skirt.
Pocket Facing and Pocket Lining
You will trace the pocket facing and pocket lining as they are. These two pieces don’t change when the skirt size changes.
The Waistband
The waistband is a single piece that circles the waist. In the XL size, this piece is made for a 34 inch waist. Because I have a 37 inch waist, I need to add 3 inches of length to this piece. I added the length to the XL size at the end without the markings, just because it is a little easier that way. Don’t forget to transfer all the markings to your tissue paper. If you are going down a size, subtract the amount you need from the XS size. This will shorten the waistband.
Keep in mind that the piece won’t measure exactly 37 inches after my modification. That is because the length of the pattern piece also includes seam allowances.
I write the changes I’ve made directly on the tracing paper as a reminder.
The modified waistband for the Kelly skirt.
The Skirt Front and Skirt Back
The skirt front and skirt back need to be modified as well. I need to add 3 inches, but I need to split this amount between the two seams that join those pieces together. That means I need to add 1.5 inches to each seam, and 0.75 inches to each pattern piece at that seam.
Modifications to the back of the Kelly skirt.
The skirt back is cut on the fold. I just extended out the side that is not on the fold by o.75 inches. Because the piece is on the fold, that amount fill be added to each side of the pattern piece.
You will also have to move the markings for the pleats on the skirt back. If you don’t, the pleats might look a bit odd, and strangely placed. If you are going up a size, starting from the markings for the XL size, for two inches that you added to the waistband, move the pleat markings out, away from the fold, by 1/4 inch. (The pleat markings are more precisely spaced than 1/4 inch intervals, but this number will serve as a good approximation for us.) If you are going down a size, starting from the markings for the XS size, for two inches that you subtracted from the waistband, move the pleat markings in, toward from the fold, by 1/4 inch. There are three lines that need to be moved.
Modifications to the front of the Kelly skirt.
The skirt front is in two pieces. I extended out the side with the curve for the pocket by 0.75 inches. This adds 0.75 inches to each piece. Again, I moved the markings for the pleats over exactly the same way as for the skirt back.
These are the changes I made to the Kelly skirt.
What about the skirt length?
If you are going down a size, it’s probably a good idea to keep the length of the XS size, unless you are also shorter than average. After all, it is easier to take the hem up a little more than to be stuck with a skirt that is shorter than you were expecting.
If you are going up a size, you can probably also stick with the XL length, unless you are also taller than average. I used the length of the XL skirt and I’m quite happy with the results. However, you need to make sure that there is enough skirt so that when you are sitting, you can sit on the skirt, and not on the hem. If you are quite a bit larger than the pattern XL size, and your pattern modifications are substantial, you may also want to add some length so that you can sit comfortably. The finished skirt length of the XL size is 23 inches. Compare this to a skirt you own, to see if this is sufficient.
What next?
That’s it! Now assemble the skirt following the instructions.
Kelly Skirt by Megan Nielsen in linen with black piping.
I hope you have found this useful. If you have any tips for making this process a little easier, please leave them in the comments.
The Kelly skirt is a softly pleated, button-up skirt. It’s quite flattering on a variety of figures and according to the pattern designer, “created with the beginner sewer in mind”.
I’ve seen several cute versions online, but my favourites are by Adrienne at Stitching on the Edge, and Andrea at four square walls. Both used piping and linen, and I thought I would do the same.
My fabric is Robert Kaufman’s Essex yarn-dyed cotton-linen blend in black. I’m a huge fan of linen, and this fabric is amazing. It’s a bit heavier than your standard linen and has a really great, slightly nubby texture. I’m already dreaming up new clothing I can make with it.
I used store-bought black piping from one of the local fabric stores. I really like this look, but when I was trying the skirt on, I found that in real-life wearing of this skirt, I would probably go with a longer top, which necessarily covers the piping detail. Oh well. I know it’s there.
Kelly skirt by Megan Nielsen in linen with black piping.
I fully lined the skirt (I’m not sure what the lining fabric is), mostly so I could wear it in the winter with tights. It makes for a warmer skirt, with smoother lines and fewer wrinkles in the fabric. The pattern does not come with instructions for the lining.
My Kelly skirt is fully lined. I have no idea what the lining fabric is.
The pattern and instructions are great. It’s an easy pattern (only 5 pattern pieces) which really is great for beginners. I’m not a beginner, so the whole project went quite quickly. I especially like having the instructions in a booklet. The pattern is printed on thick paper, so you need to trace the pattern onto tracing paper. Both the booklet and pattern are quite durable, which is always nice with a pattern you intend to use multiple times, which I do.
Piping detail on the Kelly skirt. The piping lines up nicely in real life.A better shot of the piping on the Kelly skirt.
I only have two complaints. The first is really very minor, nit picky even, but when constructing the skirt, it’s a good idea to baste the pockets to the side seams before joining the front and the back. It keeps the pocket from rippling. It’s a very small detail, but one that would probably help beginners.
The other problem I had was with the sizes. In the US, the average waist circumference for adult women is currently 37.5 inches. In the UK, it’s 33 inches. In Canada, it’s 34 inches. This skirt fits waists between 26 and 34 inches (66-86 cm). In commercial pattern sizes, that translates roughly to sizes 12 to 20. That is a pretty good range, but it would be nice if the pattern were available in an even larger range of sizes.
I recently had my fourth baby, and although I would normally be a size large in the Megan Nielsen size range, my waist is (temporarily I hope!) larger than the largest size included in the pattern. I graded the pattern up a size, which was quite easy, but not something that every beginner will be able to do.
Despite my small complaints, I thought that overall this was a very good pattern and it makes a very wearable, flattering skirt.
This is how I would normally wear this skirt, which means that you can’t see the piping. Kelly Skirt by Megan Nielsen.
Just before I made this skirt I got a belated birthday present in the mail. Can you identify these presser feet?
Can you identify these presser feet?
One is an invisible zipper foot, the other is a sew-on button foot. I was so excited when I opened these up. I know, I’m such a sewing geek.
I’ve been sewing for years, but on a very basic machine. It was one of the first purchases I made when I moved out on my own. It’s a basic Singer, with no special presser feet. Having this machine has meant that all the finishing details of my clothes were done by hand. I had never sewn on a button by machine. I had also never made a blind hem, any way except by hand. I once made a formal gown for my sister. It had a floor length, full circle skirt in satin, with layers of tulle underneath. I hand-stitched the entire blind hem. It took ages.
Kelly Skirt in linen with black piping.
A couple of years ago my husband bought me a much better machine. One of the most eye-opening things for me is trying out all the special presser feet. It has made sewing much easier and much more precise, though I still like the look of hand-finished details.
This is the first time I’ve machine sewn buttons to a garment. I like it a lot, especially for casual clothes. With a coat, I would still sew on the buttons by hand. I’ve been looking at Colette Pattern’s Beignet skirt for a while now, but the number of buttons was so discouraging. I think I see a Beignet skirt in my future now.
The Kelly skirt by Megan Nielsen.
This is also the first time I’ve made a blind-hem by machine. I’m not sure if I’m a fan. From the outside it looks perfect, of course. Though I’m not used to seeing all the stitches on the inside. When you hand-stitch a blind hem, it is invisible on the inside as well. On the other hand, the lining covers the hem, so I’ll never really see it.
Fabric: Robert Kaufman’s Essex yarn-dyed cotton-linen blend in black.
Size: XL, graded up a size.
Sewing Level: Beginner.
Modifications: I added piping, a full lining and graded the pattern up a size.
Results: Good. I would recommend this pattern and would make it again.
Kelly skirt by Megan Nielsen in linen with black piping. I promise I am much more impressed with this skirt than my facial expression might lead you to believe.